
Dulux Paint mixing is a great idea in principle because almost every shade imaginable can be created to order by taking a base paint and adding pigments. A bit of shaking and hey-presto a whole tin of paint to your exact requirements.
In practice though the system is badly flawed.
With regular painting work, I always insist my clients buy a good brand of paint but after the latest escapade I shall also insist they do NOT buy mixed-to-order paint but instead buy a stock colour.
Here’s why:
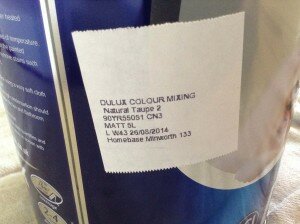
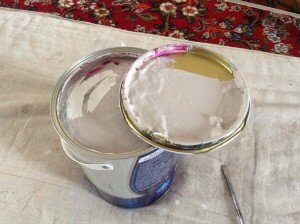
1) If the paint has stood any length of time or maybe the can inverted (even briefly) the virgin tin is likely to have formed a skin in places (possibly against the lid as in the last picture below) and this will not mix staying gloopy and white.
2) The pigments added should be thoroughly liquid but in reality often contain lumpier bits that do not mix and are then introduced onto the painted surface.
3) A full tin has no room for the liquid paint to slosh about when skaken which hampers adequate mixing.
4) The method is too imprecise to render two tins mixed to the same colour to be exactly the same so unwise on large jobs needing more than one tin.
In fact, I have christened this paint system NTSC (like the USA’s colour TV system) and it stands for ‘Never The Same Colour.’
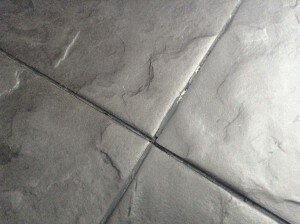
Shown below are some pictures from a recent job which illustrates perfectly the short-comings. It was a nightmare to produce a good finish because every tray full of paint was a very slightly different colour no matter how hard I tried to mix it and undissolved grains of three different pigments (black, pink and ochre) were constantly appearing.
However, apart from boycotting mixed paints altogether here are some other options:
1) Only use in establishments for the blind or visually impaired.
2) Use only for painting out dungeons, caves or cellars.
3) Rename your decorating company ‘Mr Blobby does painting’

Note: I am inviting Dulux to comment


Recent Comments