Monthly Archives: September 2013

Poachers!

I had to laugh when this invitation arrived by post today! It was not so many years ago that this Guild were so selective in their membership they wouldnt have wanted Handymen. Thanks to all the good work of our members and our Guild in promoting the skills and benefits of The Handyman, they suddenly want us know!

Sorry, but no thank you! The Guild of Handymen’s for me

Guild of Master Craftsmen

A Guide To Painting Decking

Among the popular household repair or renovation projects people often attempt for themselves is painting decking. However, the proper way to go about this involves a great deal more preparation and care than many suspect. We’d recommend that you ask a handyman before you get started with the project, so you can discuss tips, methods, and the possibility of professional assistance. But, if you’d like to attempt it yourself, here are a few tips.

1. Pressure Wash

Hand-washing may seem like the easier approach, and you can actually get the job done in just an afternoon (unless, of course, your deck is particularly large) – but this will never get your decking as clean as a pressure washer can. You can generally hire a pressure washer for just a day or two, and you’d be surprised how clean it gets your decking. This is essential, as a properly cleaned deck will retain a new coat of paint far more effectively.

2. Sand

Similarly, freshly-sanded decking will retain paint more effectively. Sanding no longer means hours spent manually stripping and removing imperfections layer by layer. Electric sanders are a powerful option that can help you go over the entire surface in a matter of hours. This will have your decking primed for the actual painting.

3. Fill Holes & Replace Nails

Little holes and gaps in your decking can set your painting job back significantly. The temptation is to fill the holes with excess paint, which is an unsustainable solution. Use new nails when needed, ensuring you go up a size to fill the inevitable gap left by a loose nail, and use an outdoor-suited filler to plug little holes in wood. Again, you may want to consult a professional regarding the specific method and technique of this step.

4. Use A Primer

Never, ever jump right into painting. Even on an outdoor deck, a primer is an absolute necessity. Think of this as a layer to be painted on – it acts as the ready surface on top of your deck that your paint will stick to perfectly and smoothly.

5. Use Oil-Based Paint

Once you’ve cleaned, sanded, and filled in the gaps – and you’ve added a full layer of primer to all surfaces you intend to paint – you can start the actual painting. Order some appropriate paint from Little Greene and get to painting that brand new deck! Patiently apply an even coat on top of the primer, and let it dry before adding additional coats if necessary.

Bear in mind, this is a very general DIY guide. Again, the quickest way to a properly painted deck is to enlist professional handyman services. But because this is a project so many people undertake on their own, just keep these tips in mind as a very basic outline if you decide to give it a try.

Spring Has Sprung

A New Way to Restore Old Grout

GROUT SHIELD, new to the UK market, is an exciting Grout Restoration System from the US, where it has established itself as the brand leader. Grout is porous and easily picks up stains.  Cleaning with bleach is only a temporary solution, so currently the only other option is to re-grout, but this is time-consuming and costly; chip a tile when you are digging out the old grout and you are really in trouble!
GROUT SHIELD is the new option; it allows you to clean and then Colour Seal the grout lines.  The seal is waterproof, stain proof, resistant to mould and mildew and lasts up to 10 years.  You can restore the existing colour, say white, or change to another colour.
GROUT SHIELD chemically bonds with the existing grout and creates a durable, protective seal.  The tiled area looks totally restored and, because it is no longer porous, remains remarkably easy to maintain – using just a neutral PH cleaner – and is protected from mould and mildew.
As there is no need to remove the old grout, the process is quick and easy to do, and GROUT SHIELD offers the handyman huge time and cost savings.  Due to the easy application and fast drying times your clients can typically use their facilities again the same day.  GROUT SHIELD can be used on any tiled surface – showers, floors, entranceways and splashbacks – and is perfect for renovating outdated decors in domestic bathrooms, kitchens, restaurants, schools, sports club and gym facilities; in fact anywhere with tiled surfaces.
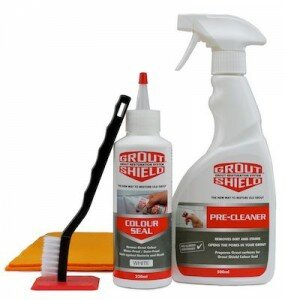
The product is supplied in a custom canvas carrybag and contains 6 bottles of Colour Seal and all the necessary cleaning and application items.  Each pack will cover between 60 sq m and 100 sq m, depending on the size of tiles, at a cost of only 80p/sq m.  With a shelf life of over three years, there need be no concern about having to use it all quickly.

GROUT SHIELD is distributed in the UK by Kilrock Products Ltd –
New Grout Sheild Pack shot _2192

Gate valves are useless!

I’m sure I’m not the only person to find gate valves a source of misery.
Gate valves are often found in airing cupboards to shut off supply within non-mains pressure water pipes and are characterised by their shut-off hand-wheel which is often red.
Whether because they are rarely turned, cheaply manufactured or fundamentally a bad idea I can’t say, but I have had to replace a good many because they very often fail.
They are often very stiff but even if you CAN get them to close they will often dribble which leads you to have to turn the wheel a bit more. But if you turn them too much to fully shut off the flow (which is their job after all) then afterwards they can then fail to open because the gate jams in the shut position …or else the spindle can shear or the handwheel comes off.